
Automai Watcher allows continuous monitoring of any application or desktop environment from any location. For this to happen, the client component called Automai BotManager needs to be configured to connect with the Automai Director securely.
Below is a diagram explaining the traffic flow.
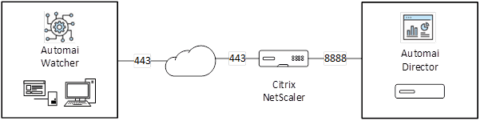
The Citrix NetScaler enables the Automai Server to run on port 80 internally but the Watcher component connects via SSL and is encrypted. Instructions sent to Automai Director will not be sent in plain text.
To achieve this secure communication, several components must be set up on the Citrix NetScaler.
- Pattern Set (automai)
- /bm
- .media
- Responder Policy
- Action: DROP
- Expression:
- HTTP.REQ.HEADER(“Server”).CONTAINS(“Apache”).NOT && HTTP.REQ.URL.SET_TEXT_MODE(ignorecase).CONTAINS_ANY(“automai”).NOT
- Load Balancer
- Server
- Automai Director IP
- Monitor
- HTTP
- Service
- Port 8888
- Server
- Port 443
- SSL Certificate
- Server
NetScaler Configuration
Let’s start with the NetScaler Configuration, here are the necessary steps you can input via the CLI:
add policy patset automai
bind policy patset automai “/bm” -index 1
bind policy patset automai “/media” -index 2
add server <AUTOMAI DIRECTOR SERVER NAME> <AUTOMAI DIRECTOR SERVER IP>
add service SVC_<AUTOMAI DIRECTOR SERVERN NAME>_HTTP <AUTOMAI DIRECTOR SERVER NAME> HTTP 8888 -gslb NONE -maxClient 0 -maxReq 0 -cip DISABLED -usip NO -useproxyport YES -sp OFF -cltTimeout 180 -svrTimeout 360 -CKA NO -TCPB NO -CMP NO
bind service SVC_<AUTOMAI DIRECTOR SERVERN NAME>_HTTP -monitorName http
add lb vserver LBVS_<AUTOMAI DIRECTOR SERVERN NAME>_HTTPS SSL <DMZ IP> 443 -persistenceType NONE -cltTimeout 180
bind ssl vserver LBVS_<AUTOMAI DIRECTOR SERVERN NAME>_HTTPS -certkeyName <SSL CERTIFICATE NAME>
add responder policy RES_POL_AUTOMAIBM “HTTP.REQ.HEADER(\”Server\”).CONTAINS(\”Apache\”).NOT && HTTP.REQ.URL.SET_TEXT_MODE(ignorecase).CONTAINS_ANY(\”automai\”).NOT” DROP
bind lb vserver LBVS_<AUTOMAI DIRECTOR SERVERN NAME>_HTTP SVC_AUTOMATI-01_HTTP
bind lb vserver LBVS_<AUTOMAI DIRECTOR SERVERN NAME>_HTTP -policyName RES_POL_AUTOMAIBM -priority 100 -gotoPriorityExpression END -type REQUEST
You will need a networking team to NAT an External Internet address to your <DMZ IP>.
What does this configuration actually do?
This configuration will publish your Director Web UI to an IP Address of your choosing, it has a responder policy placed around it that restricts the client device to the BotManager and also the URLs that can be accessed to just the ones that the BotManager uses. The process ensures secure SSL communication with the BotManager and the Director Server.
BotManager Configuration
The BotManager software can be downloaded here:
This needs to be installed on a Windows Server 2016, 2019 or 2022 instance.
The following installation instructions are necessary.
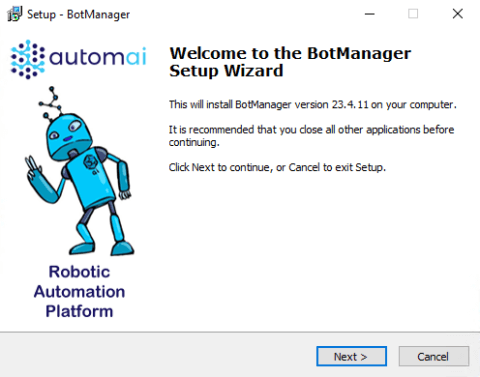
Select “Next”
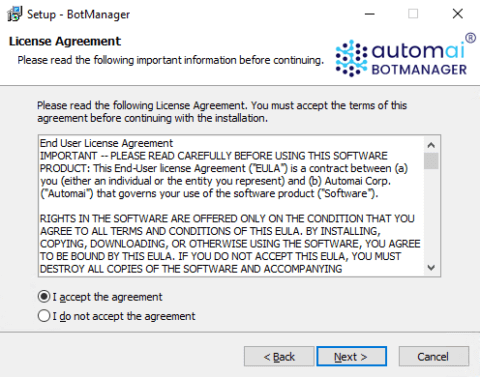
Accept the user license agreement and select “Next”
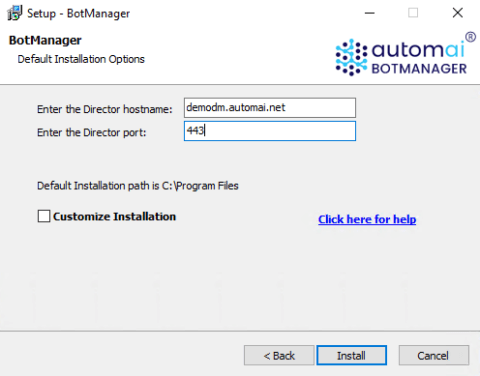
Change the “Director hostname” to your external address of your NetScaler load balancer we setup earlier. Change the port to 443 and select “Install”

Select a username and password that is already present on the BotManager machine. This standard user account should be configured to logon at startup and automatically start the BotManager. Select “Next”.

Wait for the install to complete.
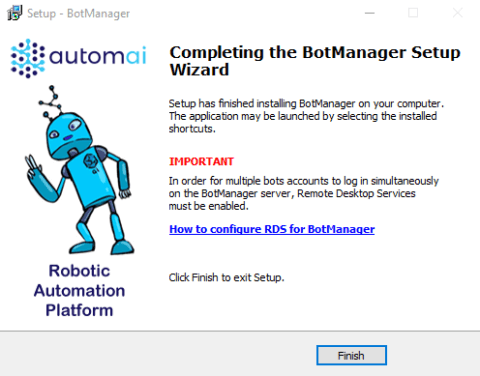
Once the install is complete, select “Finish”
We now need to tell BotManager that it will make a connection securely with Automai Director.
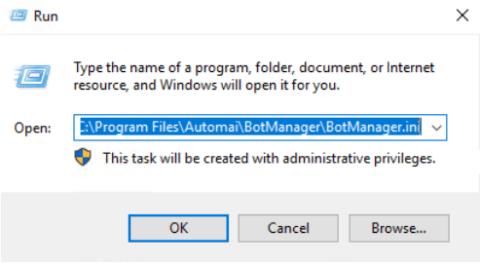
Press the Windows Key + R, type C:\Program Files\Automai\BotManager\BotManager.ini and press Enter.
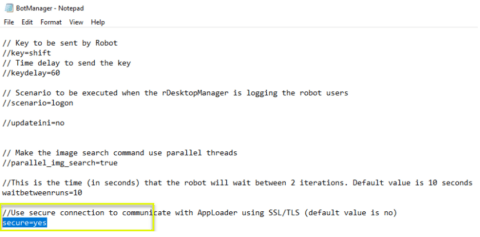
Scroll to the bottom of the file, Change secure to “yes” and save the file. BotManager will automatically restart when the ini file is edited and saved.
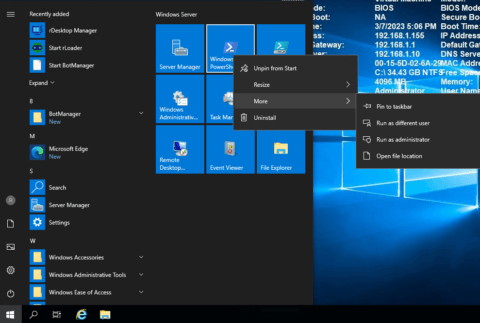
You’ll need to install terminal services, click start, right-click “Windows PowerShell”, Select “More” and “Run as Administrator”.
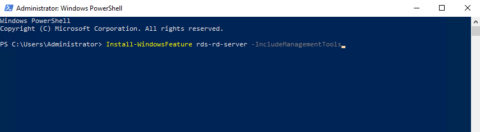
Type “Install-WindowsFeature rds-rd-server -IncludeManagementTools” into the command prompt and press “Enter”
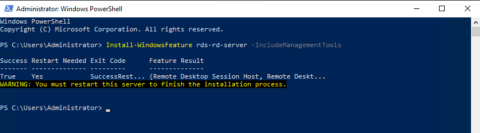
Once the process is complete, reboot the server.
You may note that the server will automatically logon with the account you configured during setup.
Login to the Automai Director server that the BotManager is configured to register with.
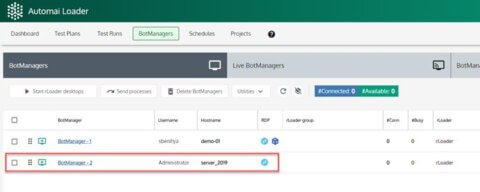
You will see here that our Automai BotManager has registered successfully.